


What would you have done as a developer, who has just learned the fundamentals of Python while navigating between the most used Python Application Programming Interface Sublime Text and Python/Anaconda Command Prompt in running and executing your codes, to interactively develop and present sophisticated Data Science projects without Jupyter Notebook?
Jupyter notebook is an incredibly powerful web application tool that allows you to integrates code and its output into a single document containing a succession of steps like narrative text input, data collection, cleaning, transformation, numerical simulation, statistical modeling, and many more.
More so, it’s a single document where you can run code, display the output, also add explanations, formulas, charts, and make your work more transparent, understandable, repeatable, and shareable.
If you want to work with data, accessing the Jupyter Notebook should be your new focus.
As the Jupyter Notebook was invented by the non-profit organization Project Jupyter to develop the Open Source Software. Project Jupyter supports execution environments in several dozen languages. The name is a reference to the three core programming languages supported by Jupyter which are Julia, Python, and R, and also a homage to Galileo’s notebooks recording the discovery of the moons of Jupiter.
But guess the sweetest part, Jupyter Notebook is completely free!!! According to the Project Jupyter website,
“Jupyter will always be 100% open-source software, free for all to use and released under the liberal terms of the modified BSD license”
Let’s Savour The Taste of Jupyter Notebook. Shall We?
Installation Process
For us to work with Jupyter Notebook, Python is a requirement that must be installed on your local machine. Either Python 3.3 or greater or Python 2.7.
Installing Via Anaconda and PIP
For a beginner, the easiest way of accessing the Jupyter notebook is by installing it via Anaconda. I would’ve assumed you have Anaconda already installed on your PC. But click here to install by following the instructions on the Download Page in case you don’t.
Anaconda has Python 3, Jupyter Notebook, all other dependencies and packages like Numpy, Matplotlib, Pandas, here goes the list, preinstalled in it.
However, as an existing Python user, you may wish to install Jupyter using Python’s package manager, pip, instead of Anaconda. First, ensure that you have the latest pip as older versions may have trouble with some dependencies. Try running the following in your terminal window:
pip install --upgrade pip</span>
You can thereafter, install Jupyter Notebook
pip install jupyter</span>
Firstly, it’d be nice to create a folder which will contain all our files for each project. Let’s create a new folder in the Documents directory from our CMD(command prompt) which is going to house all our works by using the cd command to navigate into the directory and mkdir (Make Directory) for creating the new folder called Notebooks.
C:\Users\user> cd Documents
C:\Users\user> mkdir Notebooks</span>
Launching The Jupyter Notebook
In order to start running a notebook server, open your terminal or CMD. Leave the former Documents directory by inputting cd.. Then, run the following commands.
C:\Users\user> jupyter notebook</span>
This will print some information about the notebook server in your console, and open a web browser to the URL of the web application (by default, http://127.0.0.1:8888)..) This is a Localhost. Localhost is not a website but indicates that the content is being served from your local machine, your own computer.
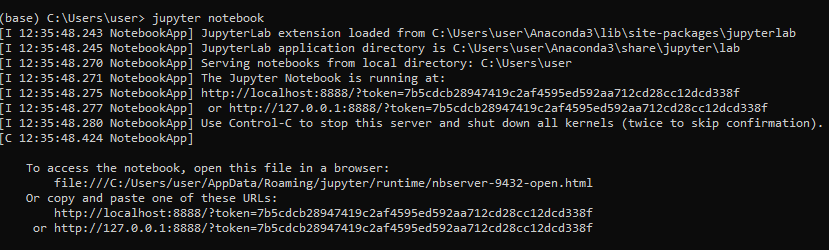
A new tab should then pop up in your browser with the Jupyter Notebook Interface or dashboard. In case this doesn’t, which is very rare. Copy and paste the link shown from your CMD to your browser.
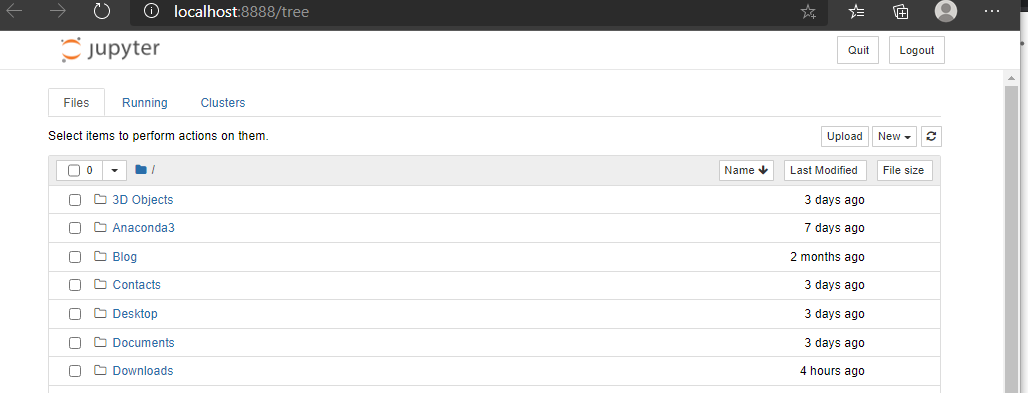
Here is the dashboard which gives you access to the folders and subfolders on your local computer. The three noticeable tabs here are:
- File Tab: This houses all your folders and files.
- Running Tab: This keeps track of all your processes. Shows the number of running terminal and notebook.
- Cluster Tab: It is provided by the Ipython parallel. For Interactive Parallel Computing in Python.
So what are we waiting for? Navigate into the Notebook folder we created earlier.
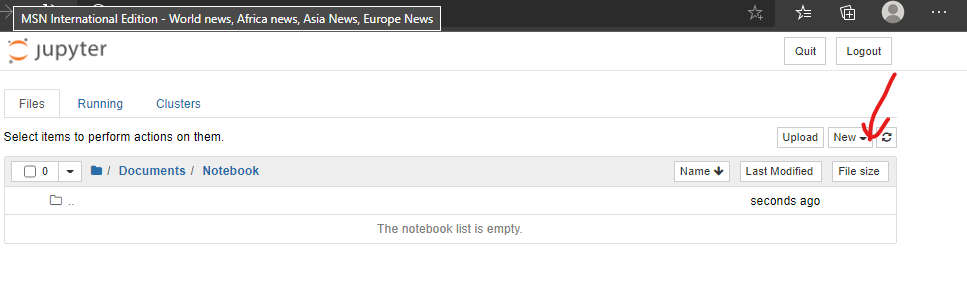
Let’s make our first notebook. We can easily do this by clicking on the New icon at the top right corner of the dashboard.
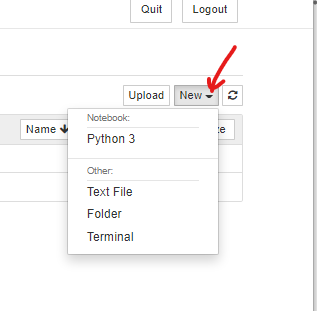
A list of options gets displayed at the click of it, to create either a Text File, a Folder, Terminal, or a Python 3 Notebook. So we go for the Python 3 option.
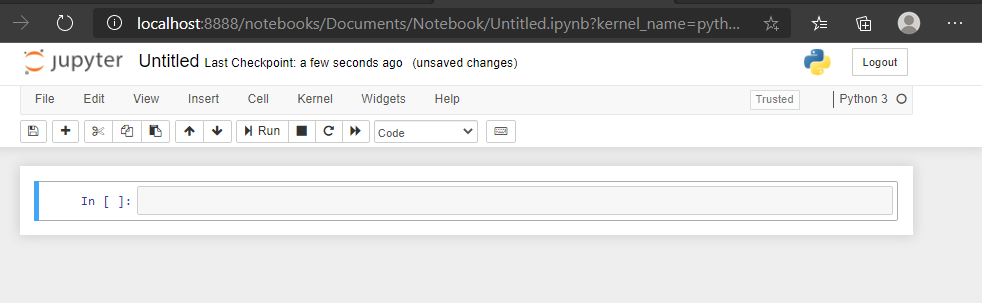
Your first Jupyter Notebook opens in a new tab. Multiple notebooks can be opened at once as each notebook uses separate tabs. It will also be reflected as a new entry in the notebook list on the dashboard.
What To Know About The Notebook User Interface

The first thing we will make mention of is the Notebook Name.
Naming Your Notebook
The name Untitled, displayed at the top of the page, next to the Jupyter logo, reflects the name of the file. Giving meaningful names to your notebook make it appear to be less confusing or prevents mix up when you are working on several notebooks. Clicking on the Untitled shown brings up a dialog that allows you to rename it.

After this, click on rename. This renames the file from Untitled to my_notebook.
The Tool Bar

The toolbar gives us a quick way of performing the most-used operations within the notebook. This helps to create sections and add styles so that the output is nicely formatted.

The first in the image above is used for saving your work while the other is for inserting new cells.

These are used for cutting, copying, and pasting selected cells respectively.

These are used for moving selected cells up and down.

Running selected cell, interrupting kernel, restarting kernel, the latter plus re-running the whole notebook are functions of the icons in the image above.
The Menu Bar

The menu bar presents different options that may be used to manipulate the way the notebook functions. They are quite explanatory enough. Meanwhile, there are two prominent and must known terminologies, called cells and kernels. They make Jupyter Notebook to be seen not merely as a content writing tool but a programming interface.
Cell
Cells of a notebook shown above, identified with the rough sketch, forms the body of a notebook. As the cell in the menu bar works hand in hand with the cell icon on the toolbar. The former shows the different cell types, the cell in the toolbar is a conjunction of execution types and cell types.
Cell Types
Code: A notebook cell allows you to edit and write new code, with full syntax highlighting and tab completion. When executed by the kernel, it displays output right under the cell. Example of how the cell work is by using the print statement on the popular “Hello World” in a cell. This is executed by pressing either the Ctrl+Enter, the Run button on the toolbar, or the Run cell option on the Cell icon of the menu bar.

workable example
However, we should take note of the In label shown right beside the code cell. It’s seen to be In[] before running the cell, changes to In[*] while the cell is running, finally, In[1] after running the cell.
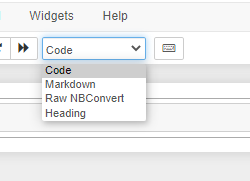
Markdown: You can document a computational process in a descriptive text using the Markdown. It is a markup language for formatting plain text. Let’s check some basic examples of how this is achievable. To try it for yourself, choose Markdown from the drop-down list.

Inserting Images In Jupyter Notebook Using Markdown
Getting an image to be displayed in a Jupyter Notebook is a much simpler operation than most people must’ve alluded here. To insert an image directly in your notebook. Now go to the menu bar and select Edit > Insert Image. Select an image from your disk and upload.

Press Ctrl + Enter or Shift + Enter .

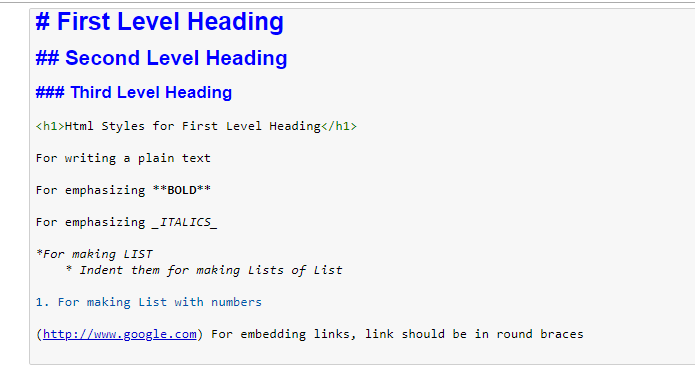
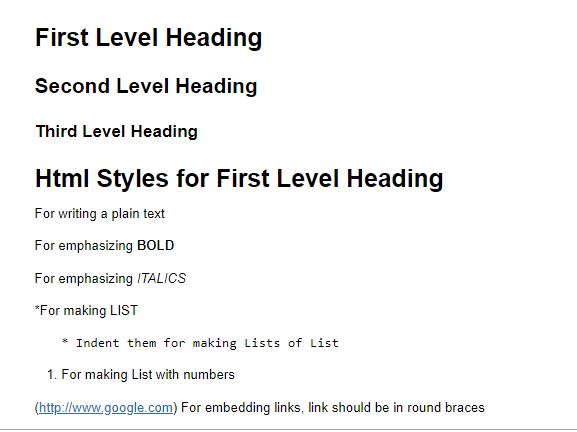
Alternatively, this is achievable by adding the URL of an image from the web. These are various examples of how markdown styles are used. However, more styles are yet to be unveiled in this article.
Raw NBConvert: This cell type is only intended for special use cases. It’s a tool for converting your notebook into another format.
Heading: The Heading cell type is no longer supported and will display a dialog that says as much. Instead, you are supposed to use Markdown for your Headings. Remember the # sign we added in the markdown examples?
Kernel
There is a kernel running behind a notebook displaying outputs. The kernel icon in the toolbar does as much work as that of the menu bar. As the Jupyter notebook is launched from your command prompt, your kernel gets activated.
Kernel
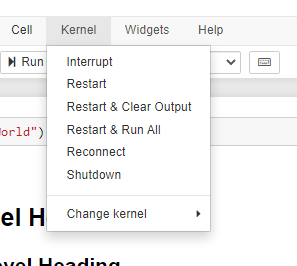
In case you are not sure if something is working as it should. There are several options for the use of the kernel.
- Interrupt: The kernel can be interrupted while running.
- Restart: To restart the running process.
- Restart and Clear Output: This restarts your kernel, executes codes without displaying your outputs.
- Restart and Run all: Restarts your kernel while running your code from the onset.
- Reconnect: For reconnecting a lost kernel.
- Shutdown: To shut down a kernel.
Exporting Your Notebook
When you’re working with Jupyter Notebook, there is always a need to share your end result with the interactive outputs being displayed in the notebook. To make your notebook share-ready, click on Kernel and then Restart and Run All. This is to ascertain that all outputs are well displayed.
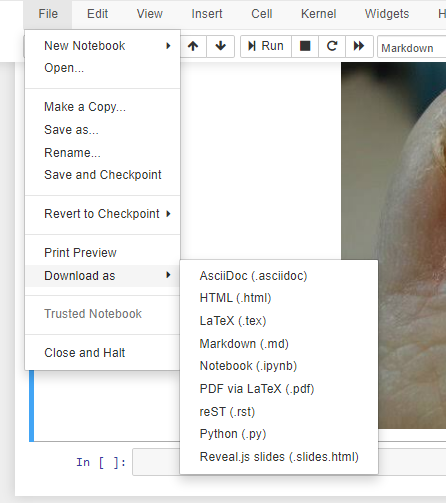
There are several formats with which your notebook can be shared. It can be exported as an HTML file, Markdown file, Notebook as .ipynb, Python as .py, even as a PDF file by clicking on File on the menu bar >> Download as >> Pick an Option. Regardless, .ipynb is the standard format for storing Jupyter Notebooks.
Conclusion
Starting from scratch, we’ve been able to grasp the usual workflow of Jupyter Notebook. It is quite useful not only for learning and teaching a programming language such as Python but also for sharing your works. You can see how packed it is in terms of features and functionalities. Moreso, turn your Notebook into a slideshow for people to see, or share it online via GitHub.
You don’t know what GitHub is? Don’t worry, It’s a step at a time!!!
Editor’s Note: AIPlusOAU is a subsidiary of Data Science Nigeria based in Obafemi Awolowo University, Ile-Ife, Osun State. Our aim is to raise a community of Data Scientists, Machine Learning/AI Engineers, and Researchers. We are dedicated to supporting young talents to start and grow their Data Science skills.
Do follow AIplusOAU onTwitter for emerging trends in Data Science, Machine Learning, and AI.