Get Your Python Flask App Deployed In a Swift

Health Technology Enthusiast || Medical Rehabilitation Student || Aspiring Dermatologist || Data Analyst/Scientist || Machine Learning Enthusiast
There’s this desire you get to share your work with others after building an application as you wouldn’t be able to carry your laptop to show people one after the other how great what you built is. Heroku shows its face where it matters, allowing developers to get on with what they do, in order to make them focus on building great apps which is the most important.
Heroku is a container-based cloud Platform as a Service (PaaS) mainly for deploying, managing, and scaling modern apps. With Heroku, there is no need to learn about server configuration, network management, or tuning the latest version of a database as all you have to do is to sign-up, download some needed tools, push your codes to the platform effortlessly, and get it up and running.
These are baby steps into getting your apps to the market so I’d be taking you through the process of creating your first flask app for those without any prior knowledge. In case you’re already familiar with the flask framework and only want to know about deployment, kindly scroll down to the subtopic Heroku Command Line Interface (CLI).
Set Your Python or Flask App
First of all, I’d assume you have python already installed on your Terminal. Let’s start off by installing the packages we’d be needing. This can be done in a virtual environment or your default python environment but it’s more advisable to set up different projects in their own virtual environments.
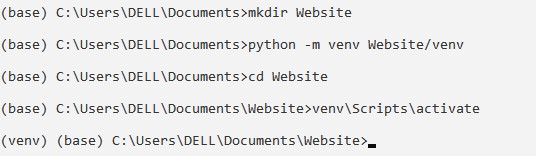
In the image above, we created a folder named Website which is going to contain all of our work, following the steps, we then activated the virtual environment. To ascertain if it’s activated, the left corner should show (venv), denoting the environment in brackets.

After we’ve set our virtual environment, we can then install the micro web framework written in Python by simply calling the command above.
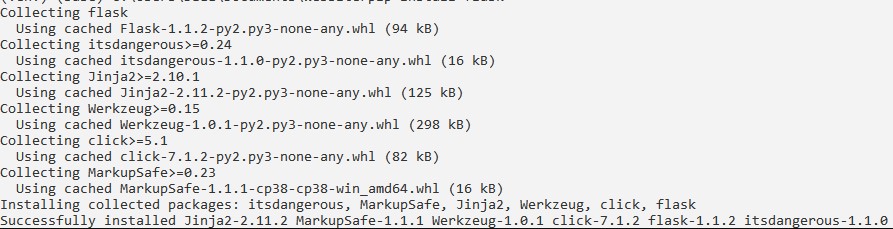
All this gets installed by pressing the enter key. To ensure this has been installed correctly and all its dependencies, follow the commands below;

- By starting the python repl using the python command.
- By importing flask.
If the code above doesn’t bring out an error, then flask is installed correctly. To exit out of that interpreter, type exit().
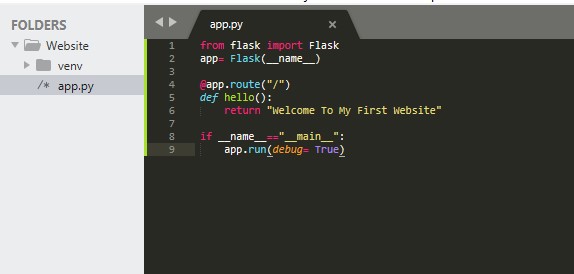
We made this by opening the project directory on my text editor as I most time use sublime text, after which a new file called “app.py”(denoting a python file), encompassing the codes above was created.
Note:
- Any text editor can be used.
- Do not cease to use your ctrl+s always if it’s sublime text you’re using.
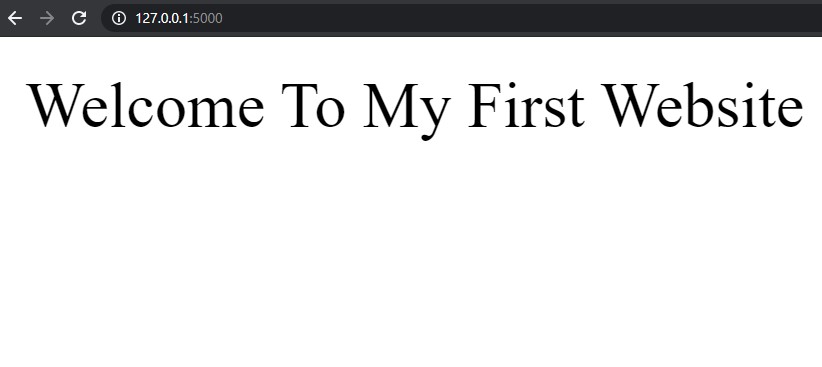
The code in the app.py file above simply implies that we now have the instantiated flask app in the app variable, and then our route with decorators to add additional functionality to existing functions as the @app.route decorator will handle all of the backend stuff and simply allows us to write a function that returns the information that will be shown on our website, so let’s run this to see how it works.

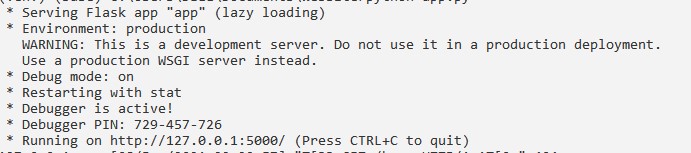
To get this up and running, enter the command above python app.py, and execute while still in the Website directory. If you don’t get any error, a message pops showing that your flask app is being served on the above IP address on your local machine with the 5000 at its tail being the port number. Copy the IP address most time referred to as localhost and paste it on your web browser.
Alternatively, instead of calling the python app.py command, this can be run directly with flask by setting the flask application using set FLASK_APP= app.py on windows, probably export FLASK_APP= app.py on Mac, lastly, calling flask run command which is going to bring about the same pop up containing the needed IP address.
Heroku Command Line Interface(CLI)
To get started with this, you’d need to get signed in on the cloud application platform with your email and password, thereafter, download the Heroku CLI which makes it easy to create and manage your Heroku apps directly from the terminal. Meanwhile, to get the Heroku CLI running, the presence of Git(Version Control System) on your local computer is required, click here to install git by following the processes step by step.
However, I know you are in haste to get the live link to your application, but we ain’t ready to launch yet, we’ve got to get some more things configured.
Install Green Unicorn (GUnicorn)

While still in our project directory, stop the running server with Ctrl+C and then, execute the command above to install gunicorn. It’s a Web Server Gateway Interface (WSGI) server implementation that is commonly used to run Python web applications.
Add a Procfile
For any Heroku web application seen, there’s a Procfile for the application. To get this done, create a file called Procfile inside the project folder in our text editor and add;

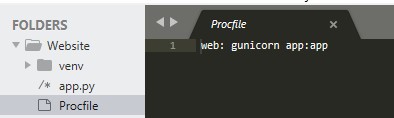
Note: The app seen in the code above specifies the name of our flask app. If yours is different, do well to set the name right.
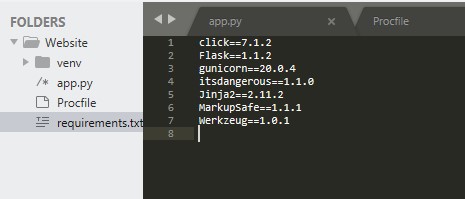
Add a requirements file
The requirements. txt file is used for specifying what python packages are required to run the application you’re about to deploy. Typically, the requirements. txt file is located in the root directory of your project.

On running this on your terminal, this automatically drops the file containing all the application dependencies in your project directory. This is what mine looks like below.
Deploy The App
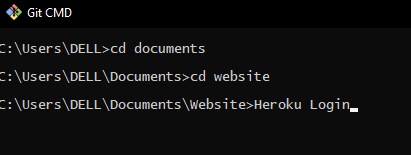
Yeah, we are there!. Open the Git CMD installed earlier, navigate to our project directory(Website), and type Heroku login.
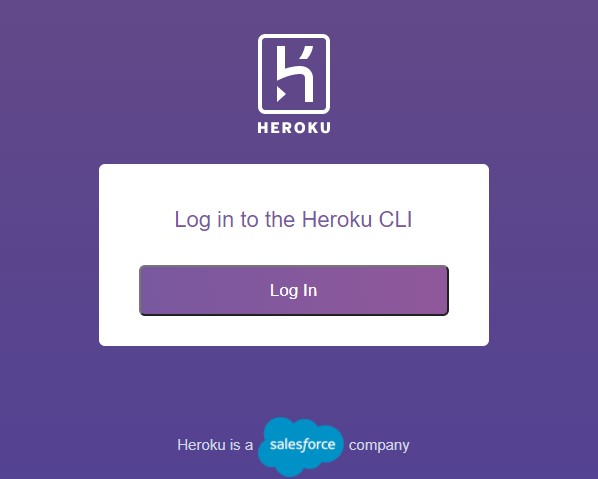
This opens in another browser, gets logged you in by clicking the Log In icon. Alternatively, type in Heroku login -i which will prompt you to enter your email address and password, and get you logged-in in a jiffy.


Now, you’d have to set a name for your web app which is going to be displayed on your link. I created an application which I purposely named webappyy by using the command above. However, any name of your choice can be used, but it must be distinct across Heroku, and the .git URL shown in the image above is where your app resides.
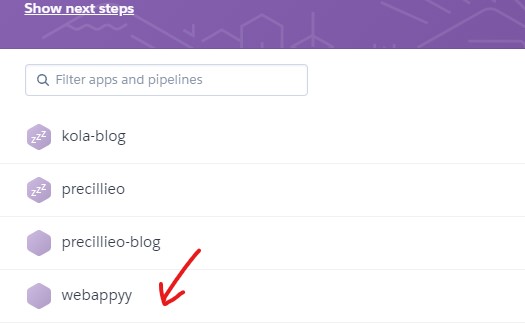
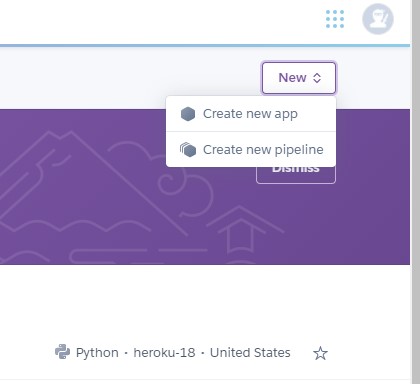
On checking your Heroku dashboard, the newly created application should be present. It can also be done manually by clicking on the Create new app icon.
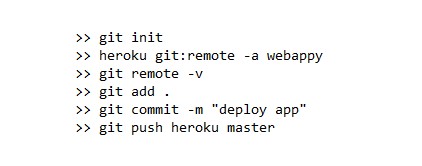
After the application has been created, before you can deploy your app to Heroku, you need to;
- Initialize a local Git repository and commit your application code to it.
- Create a Heroku remote which are versions of your repository that live on other servers.
- Git remote -v command to ascertain that a remote Heroku has been set for your app.
- Finally, Git Push command to push the codes from your local repository to Heroku remote. To implement all the stories above, input the commands below as ordered. Meanwhile, webappy should be replaced with your application name.
On getting all this done without error, the output of the command should be similar to this
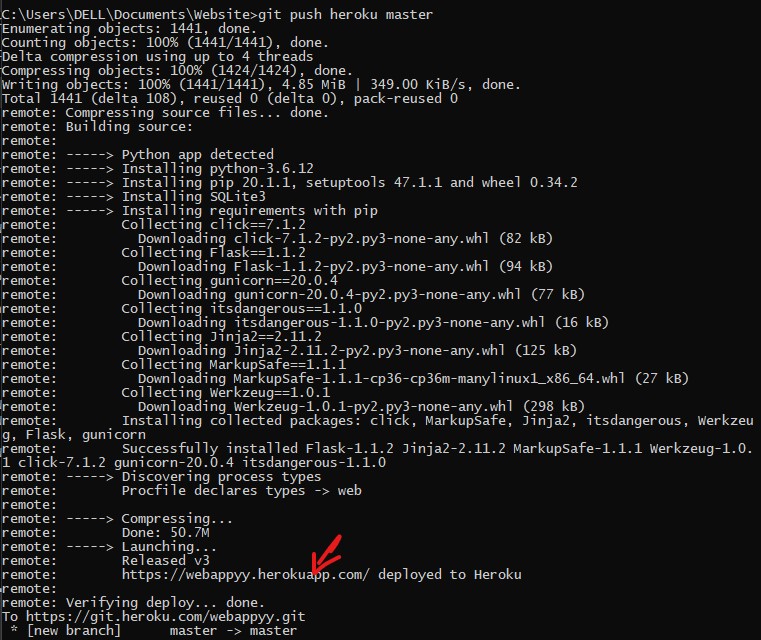
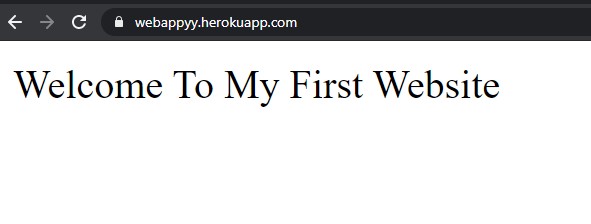
Having checked the snapshot above, with the rough hand red sketch pointing to a link, smiles, that’s the link to our web application. Copy the link and paste it in your web browser. Here’s mine!!
Deactivating Your Web App
Since your account is still unverified, and the free tier Heroku account allows at most 5 apps, you might, later on, decide to either deactivate or destroy the app completely in order to deploy new ones or even due to other personal reasons.

To deactivate, reactivate, and destroy, the above commands help in dealing with the cases. As I will be deleting this web app on finishing this article, this web app link wouldn’t be available online.
Conclusion
As this is a web app with almost no functionality, Flask is seen to offer more complex services that can be implemented for your use. The use of Heroku likewise is still very far and wide with so many juices to suck, but this is enough beginner steps in getting your application to the market.
If you’ve acquired some knowledge from this article one way or the other, do well to give some claps and share to coding buddies who may find this helpful as well. Connect with me on LinkedIn and Twitter for related talks and questions.


