Struggling to Annex Google Colab in Building your Machine Learning Models?

Health Technology Enthusiast || Medical Rehabilitation Student || Aspiring Dermatologist || Data Analyst/Scientist || Machine Learning Enthusiast
Remarkably, it costs an arm and a leg to get a decent GPU from existing cloud providers. So, how do we build Machine and Deep Learning Models without burning a hole in our pockets? How do we stop the usual “memory error” messages that do pop up any time we execute algorithms on a large dataset? You are having an ancient PC with a very low computational power?
Relax. There’s Google Colab!.
What's Google Colab?
It’s a tremendous online browser-based Jupyter Notebook that allows us to train Machine and Deep Learning models on CPUs, GPUs, TPUs for free!
Sounds too good to be true, but thanks to Google, we can now operate on large datasets, build complex models, and even share our work seamlessly with others. That’s the power of Google Colab.
The Goodies of Google Colab
- It does not matter which computer you have or its configuration.
- All you need is a Google account and a web browser.
- Here’s the cherry on top — you get access to GPUs and even TPUs for free!
- Store notebooks on Google Drive.
- Import and commit Notebooks from/to GitHub.
- Document code with Markdown.
- Load large dataset from Drive.
Training models, especially Deep Learning ones, take numerous hours on a CPU. We’ve all faced this issue on our local machines.
GPUs and TPUs, on the other hand, can train these models in a matter of minutes or seconds. Whether it is a Data Science Hackathon or a Deep Learning project, I always prefer a GPU to any other CPU because of the sheer computational power and speed of execution. Funniest, ever since I bought a PC, I’ve never for once opened a local Jupyter notebook.
You now know that there’s a ripe cherry somewhere ready for it to be plucked. How’d you get to haul them without flounder, struggle, and sweat?
Let’s get started!
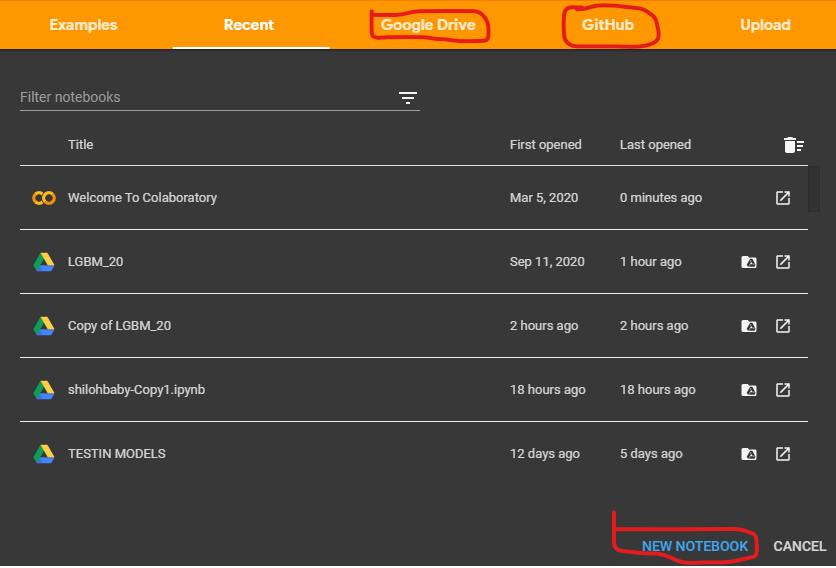
You can visit Google Colab by making a search on your web browser preferably Chrome. This is the screen you’ll get when you sign in and open Google Colab. It will automatically show your previous notebooks and give an option to create a new notebook. Here you can click on a new notebook and start running your code in it. By default, it is a Python 3 notebook.
You can also upload your local notebook to Colab by clicking the upload button.
Import Notebook from Github and Drive
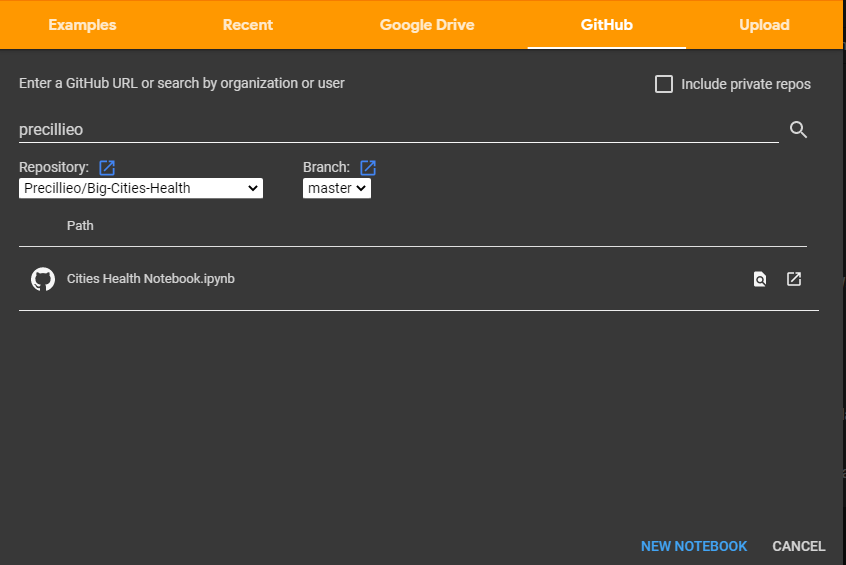
For GitHub, at first, you need to authorize with Colab, and then it will show you all available repositories from which you can create a new notebook.
All the notebooks you create in your Google Colab, are by default stored in your Google Drive. There’s a folder in your Google Drive named “Colab Notebooks” which houses all your notebooks created using Google Colab.
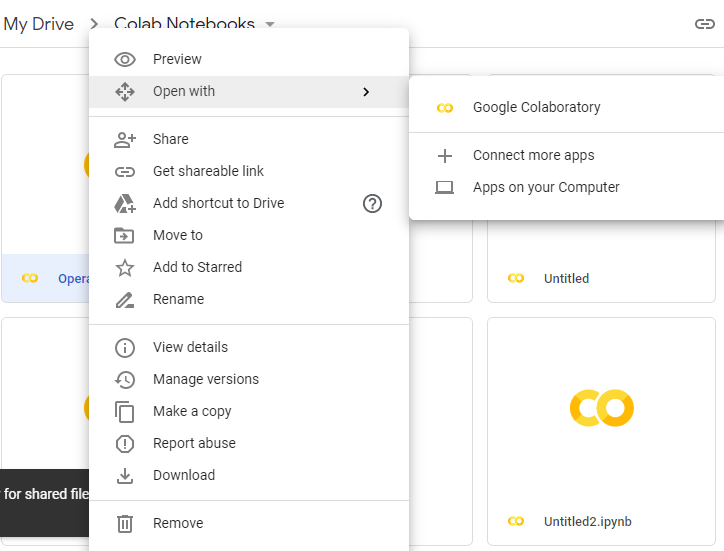
In order to upload a notebook from Drive, click on the desired notebook, then click on “Open With”>> “Google Colaboratory”.
Annexing the GPU OR TPU
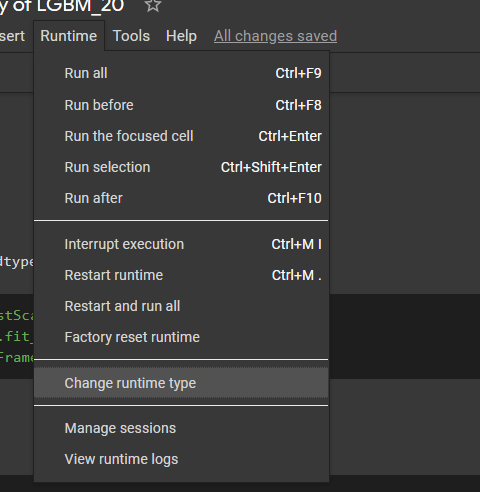
The ability to choose different types of the runtime is what makes Google Colab more powerful and popular. Here are the steps: Runtime>>Change runtime type.
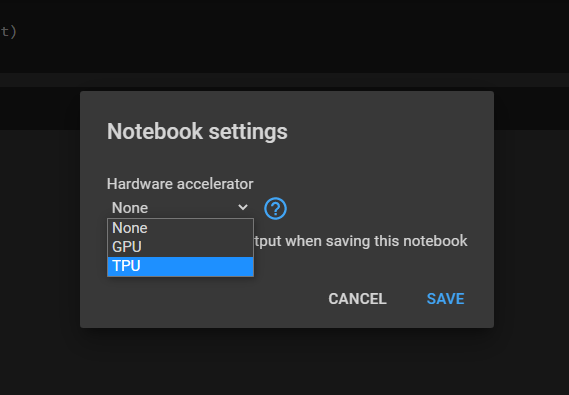
After clicking on the Change runtime type, you will be prompted to select GPU or TPU. You can change the runtime according to your need.
Data Loading
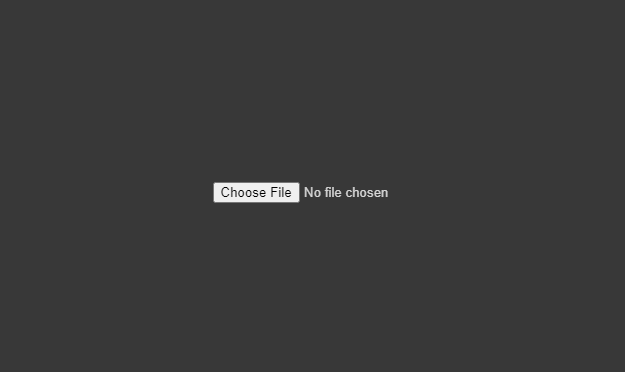
You can easily load data from your Google drive or upload the file locally from your internal storage.
Note: When a file is uploaded locally, such a file is lost anytime the runtime is restarted. You’d have to reupload every time you restart your notebook. Better still, mount in your Google Drive!
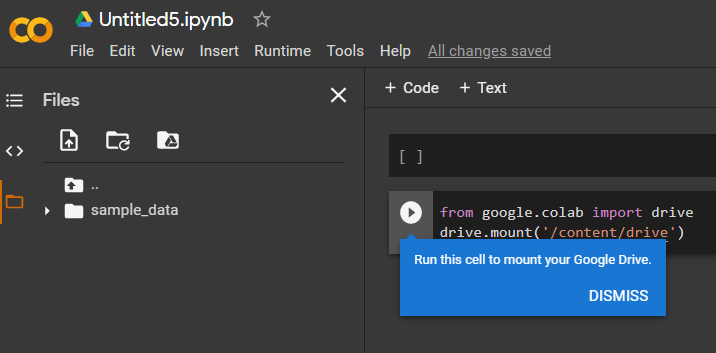
You can easily load data from Google Drive by mounting it to the notebook. To do this, type the following code in your notebook or simply click on the orange upload icon and the code pops up automatically.
from google.colab import drive
drive.mount(“/content/drive”)
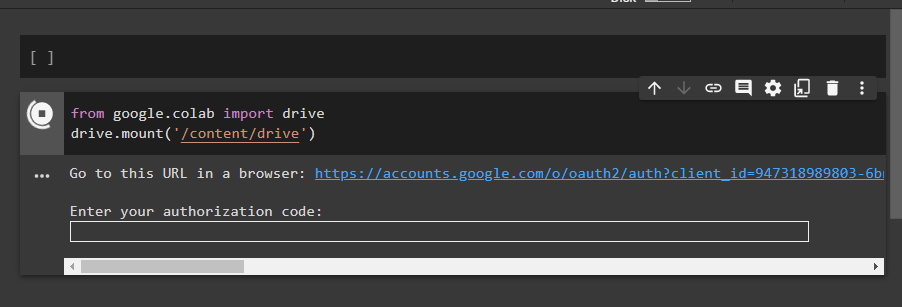
Run the code in order to make the URL visible.
Click on the link.
Login to your Google account.
Copy the codes that appear.
Paste it in your notebook.
Press the Enter key.

By going to your file section, you should see your already mounted Google drive.

Assuming you want to make use of the above labeled “Train.csv” file from your “Bootcamp2020” folder. Click on drive>>My Drive>>Bootcamp2020>>Train.csv>>Copy path.

You can then paste the copied path into your notebook. And poof! You get your dataset.

Add new lines of code or document code with markdown on Google Colab. It's simply done by clicking on the code icon or the text icon. Moreover, write a comment and also edit.
Loading data from GitHub

Cloning repositories from GitHub is one of the boons of Google Colab. Let’s say your dataset is in GitHub, and you want to load it. You can do it solely by downloading it as you download it typically in your machine.
!git clone repository link
%cd repository name.
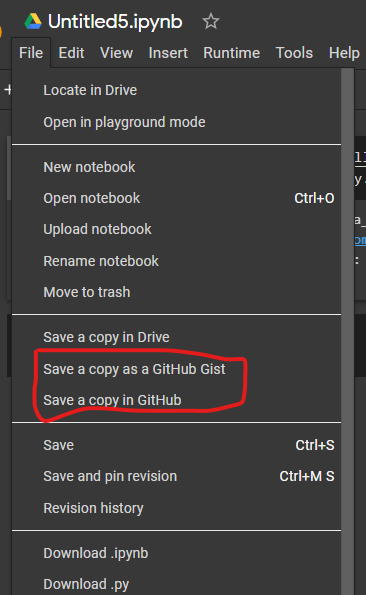
Not just that, Google Colab has made it very lenient to make a commit. You can save a copy of your notebook directly on GitHub, or you can create a GitHub Gist.

This is done by signing in to your GitHub page, linking your GitHub account to your Google Colab, specifying your preferred repository, and writing a commit message which is optional.
I love the variety of options we get!
Downloading Packages
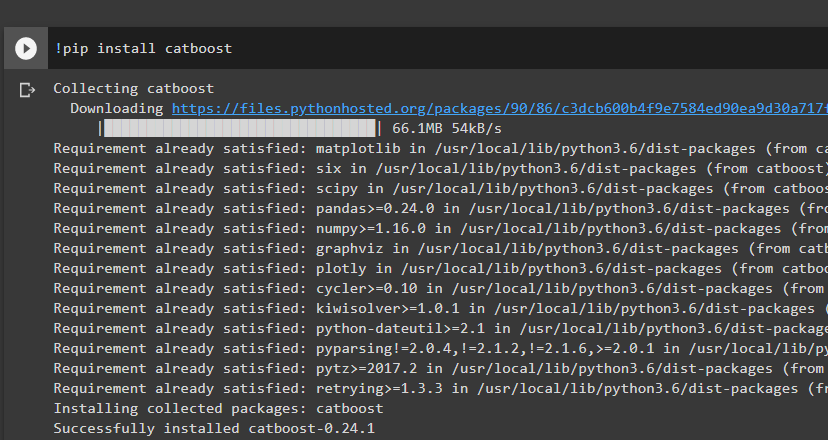
installing libraries
Although all important packages such as Tensorflow, PyTorch, Numpy, Pandas, etc are installed, with you just importing them into your notebooks, you can install further packages or upgrade current ones.
To download the packages, you can simply use the command through which you download datasets in your local machine with ‘!’ at the start.
For instance, you want to download the “catboost” package in your Colab (though it will be downloaded by default), just type the code in the above image and run the cell.
Share Your Notebook
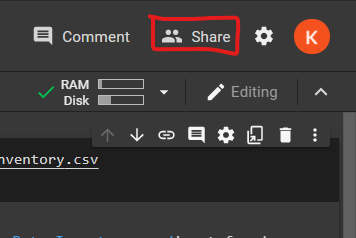
Google Colab also gives us an effortless way to share our notebook with others by just clicking on the “Share” button.

It gives us the option of creating a shareable link that we can share with friends and also on any platform. You can also invite/add others by adding their email IDs.
Moreso, attached below in this article is a complete tutorial on how to use Google Colab for Deep Learning. Do well to check it out.
This brings us to the end of the article. I hope you’ve learned and comprehended how to annex and set up your Google Colab for Data Science Hackathons, Machine, and Deep Learning Projects. If you found this article enlightening enough, do well to give some claps, share with friends, and comment below with your feedback/questions.


